Closet storage is usually treated as a collection of rods, shelves, and drawers. That is the furniture-store version of the problem. In a real house, the ceiling may be out of level, one wall may be carrying plumbing, and the opening may be 93 inches wide at the floor and 92 inches wide at the top. Good cabinetry accounts for those facts before a single panel is cut.
I have built enough closets to know that the best result is not always the most expensive one. A well-planned reach-in with melamine components can outperform a badly proportioned custom wardrobe. The aim is to give every coat, shoe, suitcase, and folded shirt a sensible place while making the room feel quieter and more architectural.
Start with the opening, not the accessories
Before choosing baskets or drawer pulls, measure the space in several places. Record the width at the floor, waist height, and ceiling. Measure the height at both sides and in the center. Note baseboards, crown molding, outlets, window trim, door swing, and any access panel that must remain reachable. A simple elevation drawing often reveals more than a glossy closet showroom.
For a reach-in closet, I generally reserve 24 inches of depth for hanging garments. That allows a hanger and fabric to sit without being crushed against the doors. Shelves for folded clothing can be 12 to 16 inches deep. Shoe shelves often work well at 11 or 12 inches, while luggage needs a wider bay and more height than most standard systems provide.
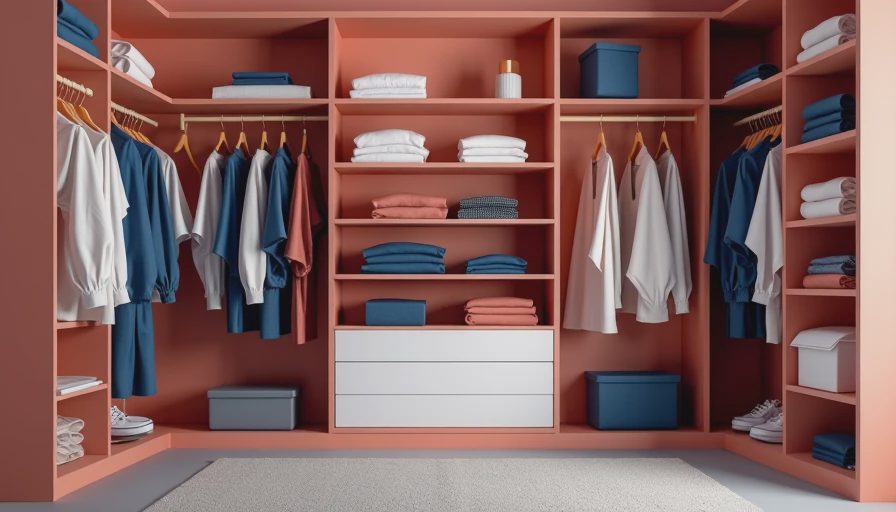
Walk-in closet storage needs a little more discipline. Aisles should not be narrowed just to gain another drawer. Around 36 inches is a comfortable target for one person moving through the space; more is useful where two people will dress at the same time. If the room is tight, one deep side and one shallower side is often better than two crowded runs.
Choose materials by location and use
Most closet boxes fall into three practical material categories: melamine, veneered plywood, and painted or stained hardwood construction. Each has a reasonable place in a project.
Melamine, such as a textured white or wood-look panel, is cost-effective and easy to clean. The finished surface resists ordinary scuffs, and factory-applied edges make it suitable for straightforward shelves and vertical dividers. IKEA and other modular systems use this approach intelligently. They can be the right answer for a rental, a guest room, or a budget with more urgent priorities.
Veneered plywood costs more but gives a cabinetmaker better options for long spans, exposed ends, and repeated fastening. A 3/4-inch maple plywood box with a durable clear finish feels substantially different from a thin shelf supported by small metal pins. For a primary closet, that upgrade often makes sense where drawers are used every morning.
Paint-grade maple or poplar face frames can turn closet storage into part of the architecture. The visible trim can match a nearby hallway built-in or bedroom door casing. I typically specify a stable sheet good for the cabinet interiors and reserve solid wood for narrow trim, drawer fronts, and touch points. That controls movement and keeps the cost tied to what you actually see and handle.
Design the storage around the inventory
Do not begin with a picture of someone else's closet. Begin with the clothes you own. Count long coats, dresses, jackets, shirts, shoes, folded sweaters, handbags, and luggage. If a client has twelve pairs of boots, a shallow shoe drawer is not a thoughtful solution, no matter how attractive it looks in a rendering.
A useful closet storage plan usually has several zones. Put short hanging garments above or beside drawers, then use a double-hang section for shirts and pants. Allow a tall bay for dresses, coats, or a vacuum cleaner. Place frequently used shoes between knee and ankle height rather than on the floor. Reserve the highest shelves for seasonal items, but do not make them so high that every change of season requires a ladder.
Drawers deserve particular attention. A 24-inch-wide drawer is efficient for folded clothing, but a 36-inch drawer can become heavy when loaded with denim. Full-extension undermount slides from Blum or Salice provide smooth travel and a cleaner appearance than basic side-mount hardware. For heavier drawers, specify slides rated for the actual load rather than choosing hardware by price alone.
Hardware is where daily quality shows up
Doors and drawers are touched more often than almost any other part of a room. Soft-close hinges from Blum or Grass prevent the sharp slap that eventually loosens a cabinet. A proper pull-out hamper should use a full-extension runner and a removable liner, not a loose basket that catches on the frame. Pull-down hanging rails can help in a tall closet, but they add cost and should be reserved for locations that are genuinely hard to reach.
For a clean contemporary installation, slab drawer fronts and small pulls keep the face of the cabinetry calm. A more traditional bedroom may call for inset doors, applied molding, or a narrow rail-and-stile profile. These choices affect labor considerably. Inset construction requires more fitting, more precise gaps, and a stable installation surface; it is not just a different door style.
Think about lighting at the same time. A closet with dark interiors and no electrical plan will hide its own improvements. Low-profile LED strips in an aluminum channel can illuminate hanging bays without looking like a strip of exposed tape. Have an electrician locate the power supply before the cabinet installation, especially if walls will be opened.

What custom closet storage actually costs
A simple reach-in using modular components might land around $1,500 to $4,000, depending on size, drawers, installation, and finish. A custom reach-in with veneered plywood, several drawers, trim, and upgraded hardware often falls between $4,000 and $10,000. A larger walk-in with painted cabinetry, hampers, lighting coordination, and specialty storage can move from $12,000 to $30,000 or more.
Those ranges are not a promise or a bid. They show where the money goes. Drawers consume more material and labor than open shelves. Inset doors take longer than overlay doors. A difficult room with sloped ceilings, crooked walls, or extensive trim requires more field fitting. If the budget is tight, keep the cabinet layout simple and spend on the parts you touch: drawer slides, hinges, and a durable finish.
One practical way to stage the work is to build the primary bedroom first, then use the lessons from that installation in hall, entry, and guest closets. Consistent shelf heights and hardware can make several rooms feel related without forcing every cabinet to use the same configuration.
Make the installation part of the design
The strongest closet storage looks built in because it is scribed to the house. A floor-to-ceiling filler can hide a wall that is slightly out of plumb. A top trim piece can close the gap below an uneven ceiling. A recessed toe kick can make a cabinet feel lighter, while a full-height side panel can make a shallow reach-in look intentional.
Ask for a drawing that shows overall dimensions, shelf spacing, drawer sizes, material thickness, edge treatment, and hardware. You should also know whether the cabinets arrive assembled or are installed in pieces. Large preassembled units are fast in a shop but can be difficult on narrow stairways. Site-built installation takes longer but handles awkward homes better.
Before approving the final layout, tape the cabinet footprints on the floor and mark the drawer fronts on the wall. Open the imagined doors. Stand where you will dress. This low-tech test catches blocked switches, crowded aisles, and shelves that are too high.
The right closet is not a display of accessories. It is a measured response to the house and the habits of the people using it. Start with an honest inventory, choose materials where they earn their cost, and let the joinery and hardware carry the daily work. That is how closet storage stops feeling like an afterthought and starts behaving like part of the room.




No comments yet — grab the first one.