Bathroom cabinets are where a bath remodel either feels finished or feels pieced together. They have to swallow plumbing, survive steam, hold up to daily abuse, and still line up with the mirror, tile, and lighting so the room reads as one piece. In a well-built bath, the vanity is not an afterthought. It is the anchor.
When I walk a job, I start with the same questions I use for kitchens and closets: what needs to be stored, who uses the room, and what is the wall actually doing? A powder room has different needs than a primary bath with two sinks, hair tools, and medicine bottles everywhere. If you solve those basics first, the rest of the design gets easier and the project wastes less money.
Layout before finish
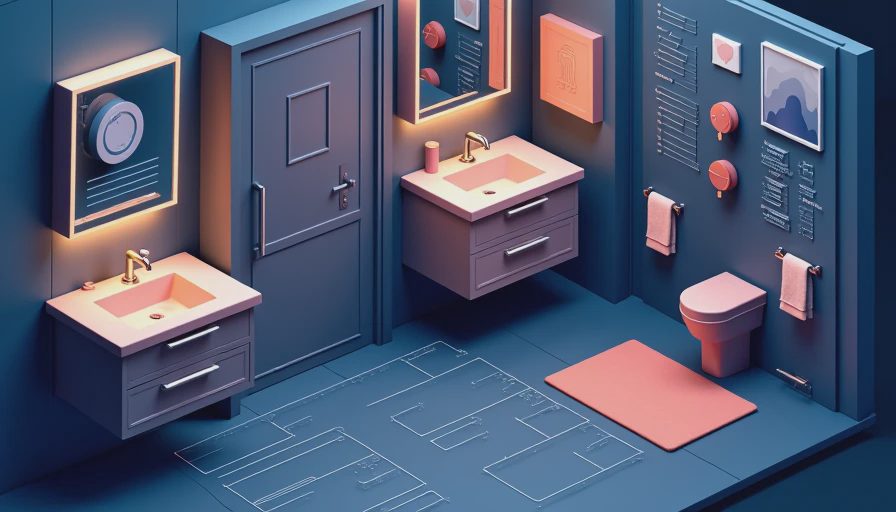
In a small bath, bathroom cabinets need to respect every inch around the toilet, the door swing, and the faucet centers. A standard vanity can look fine on paper and still fail in real life if the drawers crash into plumbing or the door opens into your knee. I like to sketch the room as a storage problem first, then turn it into a cabinet drawing. That means deciding whether you need deep drawers for toiletries, a false drawer front for the sink, or a narrow tower for towels and paper goods.
The most useful upgrade is usually not a fancier door style. It is better organization. One wide drawer under the sink is more useful than a cavern behind a pair of doors. A bank of three drawers can hold more than a single cavity and keeps daily items visible. If two people use the room, split storage so one side does not become a catchall. That little bit of planning is what makes bathroom cabinets feel custom instead of merely expensive.
For a remodel, I also pay attention to wall condition. Old houses are rarely square, and the wall behind the vanity may bow, taper, or hide a vent stack. Scribing the cabinet to the wall, or building a small filler where needed, keeps the line clean without forcing the installer to shave doors on site. It is not glamorous work, but it is the difference between a vanity that looks set in place and one that looks built in.
Materials that survive steam
For bathroom cabinets, I like cabinet-grade plywood for the box because it holds screws well and deals with humidity better than bargain particleboard. Baltic birch is excellent when you can get it, but good hardwood plywood from Columbia Forest Products or similar suppliers is a strong standard for most shops. If the room gets regular steam, use a sealed finish on every exposed face, including the back and underside. Water finds the unfinished edge every time.
Painted doors are a good place for MDF, especially on flat-panel or Shaker fronts, because it stays stable and gives a smooth finish. Just seal the edges and do not pretend MDF likes standing water. If a vanity top leaks or the base gets mopped hard every week, the weakest edge will show it. For stain-grade work, maple, white oak, and walnut all make sense depending on the house. White oak has become popular for a reason: it is durable, takes a clear finish well, and reads clean in both modern and traditional rooms.
Finish matters as much as species. A sprayed conversion varnish or a good two-part polyurethane gives the best resistance for a bath cabinet. Brushed enamel can look fine in a powder room, but in a family bath I want a finish that can handle wet hands, toothpaste, and the occasional shampoo bottle falling from the counter. The goal is not perfection forever. It is a surface that ages slowly instead of peeling early.
Hardware and storage details
Good hardware is the part of bathroom cabinets that nobody notices until it fails. Blum soft-close hinges and undermount full-extension slides are common for a reason: they stay aligned, they close quietly, and they let you reach the back of a drawer without digging. I see a lot of frustration caused by cheap side-mount slides that bind when loaded with heavy items. If the drawer carries blow dryers or toiletries, full-extension hardware pays for itself in daily use.
Think about the little accessories only after the box is right. A pullout for a trash can works in a larger vanity, but a simple drawer divider often solves the same problem more cleanly. Rev-A-Shelf makes decent inserts for hair dryers, waste bins, and trays, but I would rather build in basic, durable partitions than fill a cabinet with gadgets nobody maintains. A bath is not a display shelf. It is a room that needs to work at 7 a.m. when the light is bad and people are in a hurry.
This is also where the mirror and lighting talk needs to happen. If the vanity is taller than average, the mirror should not be hung too high. If sconces are planned, the cabinet width should leave enough wall for them to land without crowding the sink. A lot of remodels look off because the vanity was ordered before the rest of the room was drawn. That is how you end up with a cabinet that fits the wall but not the house.
Budget tiers that make sense
The budget conversation gets easier when bathroom cabinets are compared by construction, not by showroom gloss. A stock 30-inch vanity from a home center can start around $300 to $800. Semi-custom pieces often land around $900 to $2,500 once you choose a better finish, deeper drawers, or upgraded hardware. Custom work usually starts around $2,500 for a simple single vanity and climbs fast if you add inset doors, tall linen storage, matching wall cabinets, or a furniture-style toe detail.
That spread is why I do not push custom for every bath. If the room is a straightforward guest bath and the opening is standard, a solid prefabricated cabinet with a good top is a smart use of money. If the room has odd dimensions, a tight corner, or storage needs that off-the-shelf units cannot solve, custom becomes easier to justify. The premium is not just for wood. It is for fit, finish, and the hours of problem-solving that keep the project from looking adapted.
If you are comparing bids, ask what is actually included. Are the drawer boxes solid plywood or thin thermofoil? Are the faces painted in the shop or finished on site? Is the top separate, or is the cabinet being built around a stone slab? A lower number is not always a better buy if it leaves you paying twice for repairs or replacement in five years.

A remodel checklist that saves money
When I spec bathroom cabinets for a remodel, I want the rough plumbing, electrical, and finish dimensions settled before the shop builds anything. Measure the exact wall width after drywall, not from the old cabinet that came out. Confirm the sink style, because a vessel sink, undermount sink, and integrated top all change the cabinet height and drawer layout. Check outlet placement early so you are not cutting awkward holes in the back panel after the fact. And if the room gets used heavily, make sure the exhaust fan is sized and working, because no finish can fight bad ventilation forever.
I also tell homeowners to spend where they touch the cabinet every day. Better hinges, better slides, and a better finish are worth more than a decorative end panel nobody sees. A simple profile done well will age better than a complicated face frame that was built cheaply. If you want one upgrade that changes the whole room, choose deeper drawers with clean internal partitions. That is where the daily clutter disappears.
If your current bathroom cabinets are too shallow, swollen at the toe kick, or missing drawers where you need them most, that is a good sign the room is ready for a better layout. The best projects are not the ones with the flashiest veneer. They are the ones where the cabinet fits the space, the finish survives the moisture, and the storage matches the way the room is actually used. If you are planning a remodel and want help translating rough dimensions into a cabinet that works, start with a drawing and a real material spec. That is where the savings and the satisfaction both begin.



No comments yet — grab the first one.